From a conversation with a friend who I was offering my skills as a 3D printer mechanic to, reminding her that it’s both easy and fun to fix her Ender so she can print things again and she wouldn’t need to feel bad about asking…
Me: “You know, 3D printers are really really neat things! We should strive towards fully-consumer-oriented reliable printers and friendly tooling so that people can alter their world in new and different ways”
Also me: [Looks uncomfortably at all of the mods I have done and want to do to my printers]
Frame - Z Rails
- The nut bars feel a little flakey. I can’t necessarily critique the way that Formbot printed them because I pulled them into my slicer and they are really tiny minimal parts and I’m not sure I’d do better on my Ender. As such I opted to assemble them with the nut bar facing towards the linear rails and the nuts facing the extrusion rail, however this means that the M2 nuts want to pop out and get stuck where the screws can’t quite reach. ChrisA, who is building roughly the same printer at roughly the same time points out that the nut inserts are better in many ways than the threaded bar because the steel would make the beams bow when heated and also add weight. I’m assuming that the effect that makes the extrusion backers isn’t going to happen here because the steel is exactly in the wrong place so I’d tend to agree with that logic and would also add that M2 threads are delicate.
- First error of assembly: On Pg 26, you are adding stoppers to one end of the Z-rails but leaving the other side alone because you add those later. I added stoppers to the wrong side. No biggie, I guess the angle that the image is rendered makes it a bit unclear.
Frame Z-Axis
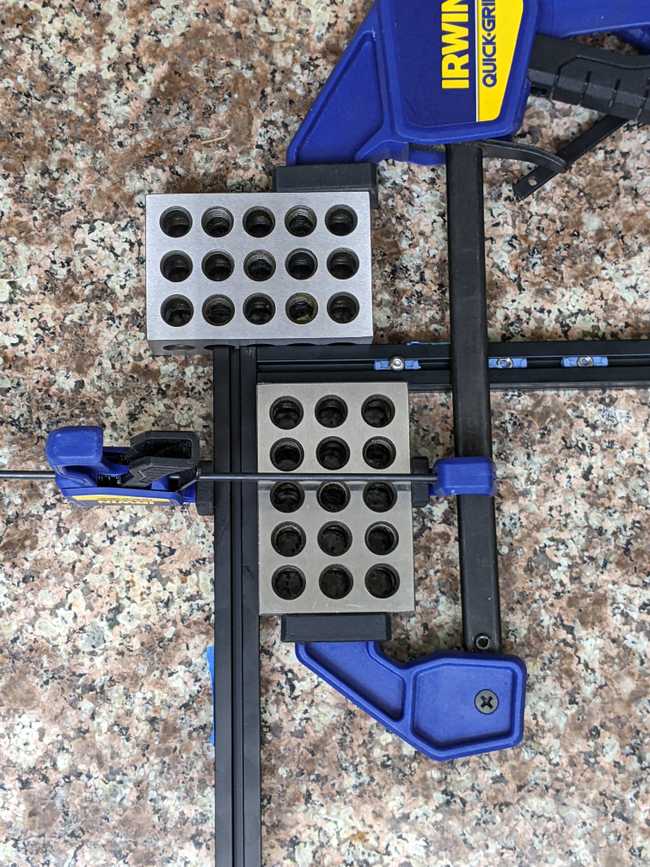
- My technique for squaring the frame is to use 1-2-3 blocks with little clamps as the right-angles and I used my granite countertop as the flat surface.:
- Minor surprise here on pg 35. There are exactly 5 railstops. I had exactly 5 railstops in the kit. I kinda breezed ahead-ish and figured that I was missing either one or three railstops. Oops! Let’s keep going.
- Okay, now things get weird. My Formbot kit comes with the Kirigami bed so I skip a bunch of pages.
Heat set inserts
Traditionally I’ve avoided dealing with heat set inserts. Also, I have not used the right tip. So I got the LDO insert kit and put it in my now quite old Hakko that predates the current generation to see if it would work. It seems to.
I put the inserts in the DIN rail mounting brackets for the boards and the DIN rail bracket before I got started on the actual parts because I was a bit concerned about screwing it up.
My one complaint with the LDO insert kit is that I wish they’d included something other than a pair of heat set inserts to set the distance on the tongue, because it’s hard without magnifiers to see where each part ends. On the other hand, getting out my flip-down magnifier hood is always useful for getting things right. And, otherwise, this made the process a lot easier.
Kirigami Bed
- Starting out, I am using the Pre-release version of the Kirigami Manual. I am assuming that I’m using the IGUS or a generic clone.
- The manual’s great but then I run out of the sections that Kag_ee has so then I needed to switch to the LDO guide to finish up.
- This is a bit of a weird section for documentation across the projects. Most of the kits these days are coming with the Kirigami bed instead of the extrusion bed. There are pros and cons for each bed type but overall the Kirigami bed is going to be a bit happier because of the rigidity for the stock zero even if some of the other projects like the TriZero seem to be happier with the extrusion bed. But the Kirigami bed is a custom-manufacture product and so if you are sourcing it yourself, it’s another barrier between you and a full BOM to start building.
- The kit doesn’t come with the Stealth bumper at the front. I’m not entirely sure I’ll bother adding one, actually.
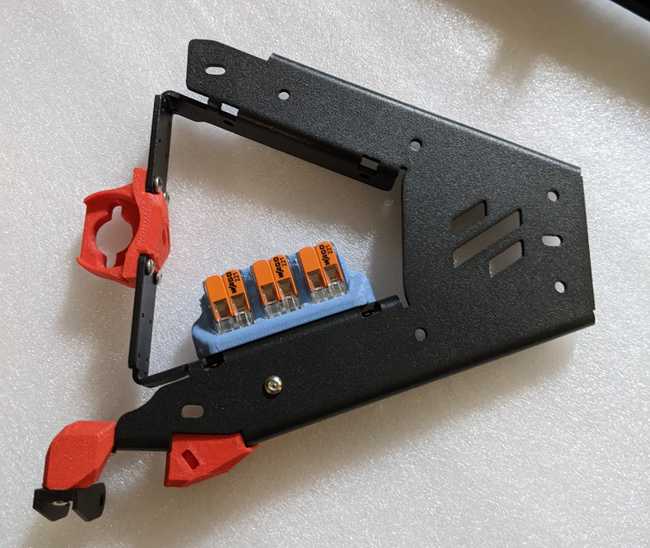
- Everything came together just fine, so the issues older people’s builds had got fixed. I added the Wago connectors to make wiring easier for me.
Frame - Z Axis
- Second error of assembly: Everything went together fairly well except that now I need to move the Z-beams a lot from where I had them set up initially. After looking back, I realize I’d set them ~58mm from the outer edge of the H extrusions, not ~58mm from the inner edge of the H extrusions, so I ended up having to do a bunch of re-squaring.
- Mounting the bed on the Z rails was annoying. It turns out that the best approach was to grip the M2×4 screws with my tiny tweezers, apply threadlock, and then kinda drop them in while wearing my magnifiers. Which is extra-fun because I don’t have depth perception.
Frame - Z Endstop
- The microswitch that was provided by Formbot already has the wires ready and also is the type that doesn’t have a lever on it.
- Minor surprise: The M2×10 self tapping screws are Philips.
Frame
- I’m preloading extras. One might even say that I went nuts with the extra nuts.
- I realized that if I wanted to install the Voron V0.2 deck plate cover for Kirigami mode, it would be awfully convenient to do so right there. The problem that I’m having is that the Z endstop is something where any degree of creeping would be bad and that modification replaces the PET-GF printed Z endstop mount. So I’ll do that mod… later.
- On pg 58 of the manual, it’s not entirely clear what you are supposed to be using, on the left side of the page. I am presuming that it’s the other end of the IGUS (or generic clone) cable guide.
- There’s a reminder for the Nevermore filter but the instructions for the ZeroFilter inside of a stock Zero are a bit ambiguous so I just made sure to have plenty of extra preloaded screws there. (Remember the entire purpose of this whole exercise is to have filters inside of a printer chassis)
Summary: A moment for the mindfulness
I’d hoped to be at this point maybe a bit earlier but storms and power outages and other projects and other real life things intruded. It’s starting to look like… you know… a 3D printer… instead of a bunch of somewhat random parts on the floor, so I put it up where it’s going to live when it’s done. Which makes me feel better.
I’ve made a few mistakes so far, but nothing too bad. Although I’ll find out later if I forgot to preload something, heh heh.


