Just outside of the Amazon return window but before the actual warranty went out, my printer’s motherboard failed, which triggered some maintenance and upgrades.
Walking away from the printer and a Spaghetti Detective
After getting the printer, I’ve been printing like mad. A lot of other people’s designs off of Thingiverse or Prusaprinters, mostly. It’s an easy way to understand what prints, what I want to design myself, et al.
I set up a webcam so I could keep an eye on things pretty much instantly but I discovered that, because of my network topology, I had to use some sort of proxying service so I created an account with the amazingly-named Spaghetti Detective to keep an eye on things.
It didn’t detect this failure, but I’d triggered a print, made sure the first layer was plausible, walked away, and then realized that my printer was making a grinding noise and there was spaghetti on the bed… but it didn’t trigger.
So I’m mostly using it as a way to stream the camera and not to catch failures, although I also partially blame myself because I’ve not yet fabricated a proper mount for my camera and stuff so it’ll maybe work better with lights and the camera positioned better?
Debugging a broken 32 bit Ender motherboard
So, with the grinding failure and the mess, my initial thought was that it was just a leveling problem, but it kept making the noise when I triggered another print. So… yeah. Something was really wrong.
My first suspicion was that I’d screwed up the belts, so I lifted things up and that looked fine.
I then spent a bunch of time trying to check the limit switches in various ways… but that was actually silly because the right thing to do is just to go into the G-code console and use the “M119” command to read the values and that showed me that the limit switches were fine.
Eventually, I realized that one of the axes would only move in one direction. It hadn’t registered at first because I was so focused on the limit switches.
And then I swapped the X and Y axes and that revealed that the stepper driver was broken, which is apparently a thing that can happen! If you look at the wiring of pretty much any of the 3D printer controller board, there’s a set of signal lines that goes to the stepper motor drivers and one of them is the direction, so probably there’s a trace or pin that passed inspections and then failed subsequently.

So, I created a support case with Amazon, which led me to doing some conversations with the vendor and (after I explained my precise set of debugging steps) they agreed to send me a new motherboard.
Debugging some set of motherboard issues
Basically, this is a useful list of checks to make sure that the connections are all right and the stepper motors are working right:
- With the printer off, move the head to a neutral position.
- Go into the menu and move each of the axes in both directions.
- Turn the bed temperature to like 80 degrees, make sure that the bed is the part that’s heating up and not the head.
- Turn the head to 200 degrees, extrude a bit.
- Turn the part cooling fan on and off
- Go into the G code console and use M119 to verify that each of the limit switches work.
Putting it together with a BLTouch this time
Now, with my new motherboard, I put it together. One thing I will note about the Ender 3 design is that it’s really not great for working on. They shoved the power supply and motherboard underneath the bed and so you have to flip the printer but there’s not really a particularly safe way to flip the printer so you end up either having to dismantle the printer or kinda turn it on the side over the edge of a table.
This took a while because I’ve been busy with everything else.
Right before the printer broke, I’d ordered a BLTouch but I hadn’t actually gotten around to installing it. So, I figured if I was going to put the works together, I’d just install the BLTouch too.
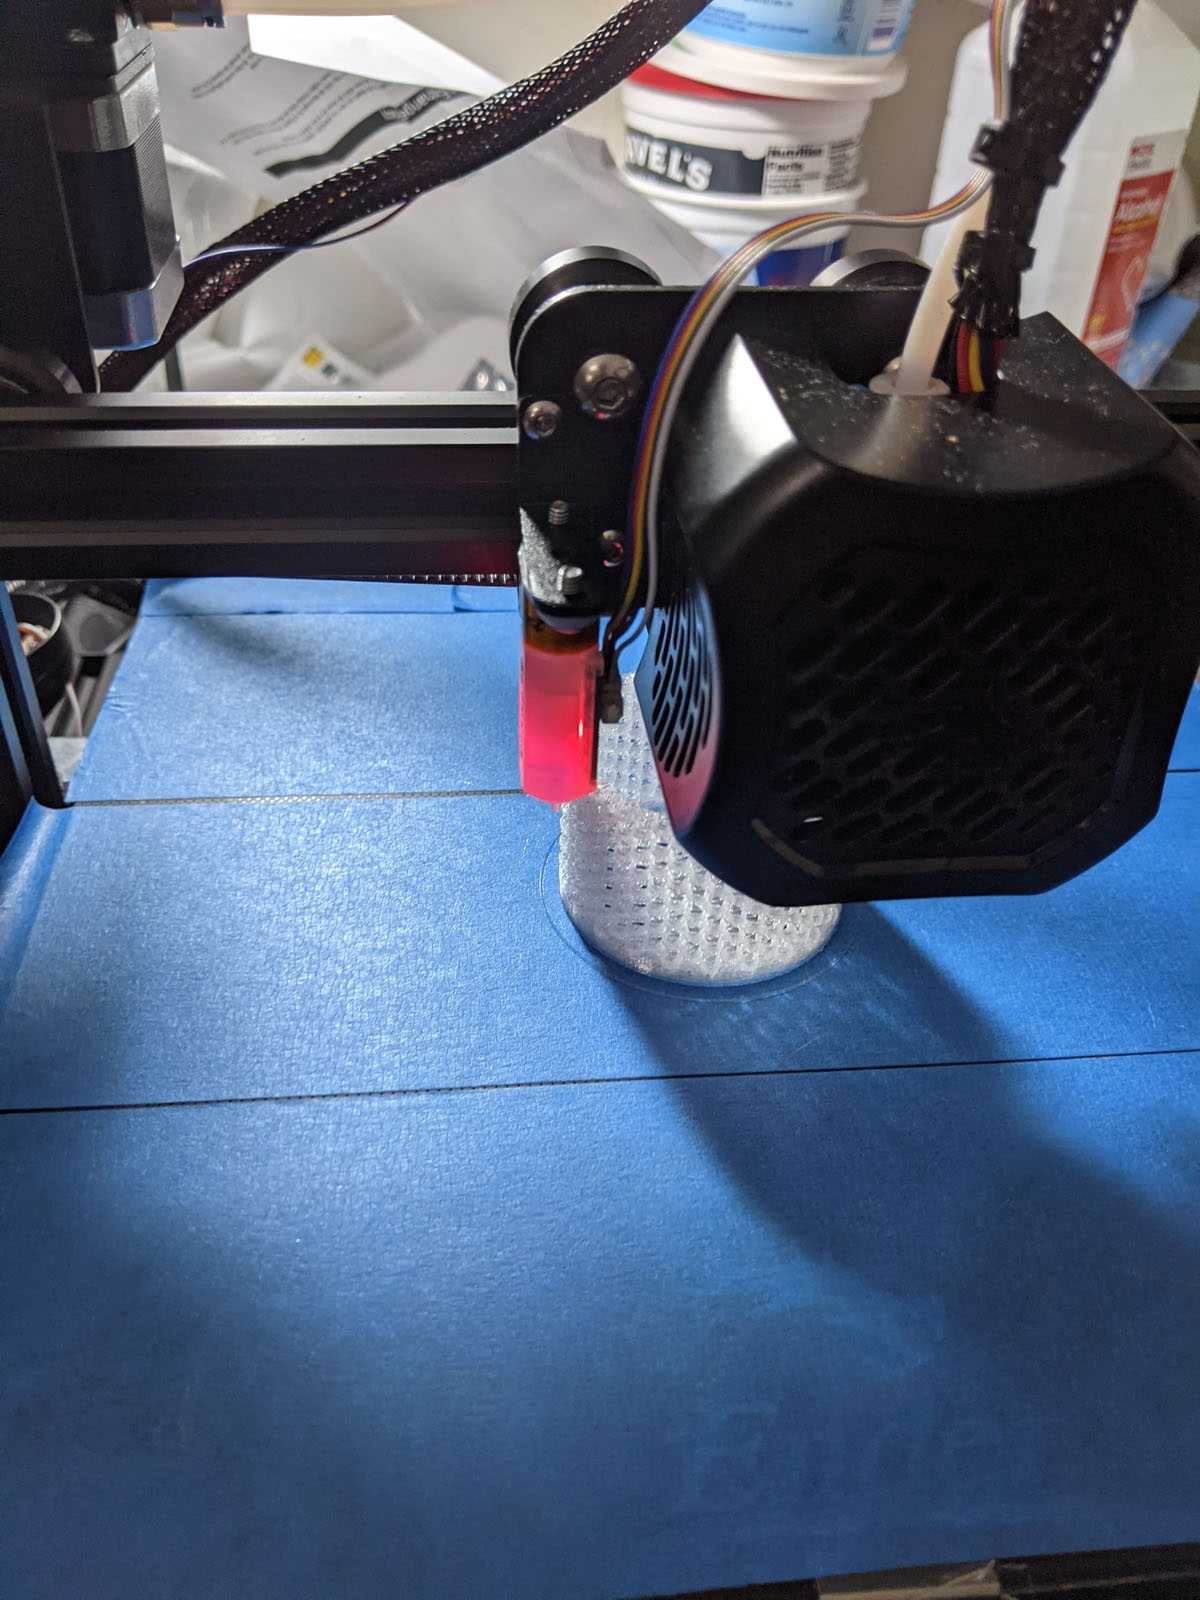
I used the CHEP instructions for installing a BLTouch. There’s a lot of versions of the instruction and the BLTouch probe out there but the version I got from the official Creality store comes with a 5-pin connector that plugs straight into my 32 bit motherboard so I don’t need to do a lot of the things that previous motherboard versions would require and it also comes with a metal bracket that screws straight into the holes on the Ender 3 v2.
The BLtouch and bed leveling.
Technically “bed leveling” is really “tramming” is on a mill or other such machine.
I was having a lot of frustrating first-layer problems with my printing. I couldn’t quite get the whole thing level all of the way around and through and it was a real annoyance. I was starting to suspect that the stock bed wasn’t flat and that didn’t sound especially great.
I’d already switched to the yellow springs, which did wonders for not having the bed leveling drift every day or so. Also, I’d already upgraded from the piece-of-paper-sliding method to using actual metal feeler gauges and it was still really touch-and-go.
Hence, getting a BLTouch seemed like a good idea, if for no other reason than to measure how bad the bed was before screwing with things.
I am still using the official firmware, but I switched to the updated version that’s got support for a BLTouch built in. And I installed the Bed Visualizer for OctoPrint.
So far, it turns out that my bed is a lot flatter than I was worried about.
Also, it turns out that it’s a lot easier to get the bed really level if you have the sensor. Obviously, I could just let the bed-leveling “fix” a seriously messed up bed, but it’s still better to get the bed level in the first place where the bed leveling sensor just helps you get it there and adjusts for a any irregularities in the bed itself.
So far so good on the bed leveling.