Most bike tires (except for the fancy modern tubeless type) have an inner tube to hold the pressure and a tire that isn’t necessarily fully pressure sealed to add rigidity.
Unlike cars, we don’t have a compact spare in back, can’t afford to have super-sturdy tire casings, and don’t get our path swept adequately. Thus, fixing flat tires are somewhat inevitable.
There are a variety of things that cause flat tires. Generally, all it takes is, regardless of material, the correct shape of a wedge to embed itself in your tire far enough to puncture the inner tube and enough pressure to force it through. A piece of wood works just as well as glass or metal. I’ve had just as much trouble with thorns as I have had with metal and glass.
There is also user error. I’ve managed to over-inflate and under-inflate my tires and experienced the increase in punctures that over-inflation can cause and the sidewall failure that being far too lax about keeping the tires full will cause. And I trapped the inner tube between the tire bead and the wheel rim. And I’ve worn out tires and realized they were worn out because they flatted on me.
I’ve been surprised by how resilient non-racing tires can be, even without substantial thick belting. Mountain bike tires doubly so. On the other hand, no matter how fancy your tires and tubes are, they will flat. It just takes the right flat-causing object and a moment of inattention to not see it. Maybe you ride on thin tires and it’s just a broken bottle. But even the self-sealing mountain bike tubes and kevlar-belted tires can be damaged by road or trail debris in such a way that they fail to self-seal.
They have been trying for years to sell folks air-less tires but they’ve never caught on, except for wheelbarrows and strollers. This is for a good reason.
Thus, it’s a rational assumption that you really need to be prepared for flat tires.
Things that ruin your day have a certain way of really ruining your day. You need to understand this. So you might get a flat and tell yourself that you are all prepared for it. But maybe your pump broke. Or maybe you discover that your spare inner tube has a broken valve. Or maybe you ran over a sharpened piece of metal and your tire’s also screwed up. I’m writing about this because it can and has happened to me and people I know.
Also, when you flat, it’s important to understand what happened. If you’ve got a piece of glass embedded in your tire and put a fresh tube in, it’ll just flat again. The same goes if the sidewall failed.
Spare tubes and patching tires
There are generally two things you can do if your tire has flatted. First, you can put a spare tube in. Most under-saddle bags can carry at least one and sometimes two tubes. I deliberately picked out bags that could carry two. I wish that bike tube makers would sell them in nice vacuum-sealed metalized-plastic pouches instead of boxes such that they’d be compact and resistant to getting scraped up by the other stuff in a trunk bag. Instead, I generally take at least one of the tubes out of the box and put it in a ziploc bag so both will fit.
There’s a slight chance you might discover that you’ve got a dud tube. Because most inner tubes are made in a small number of factories and simply branded differently, you can’t necessarily go by brand name. There’s a reason why I usually carry several spares, just in case. I usually have one or more extras in my trunk bag or panniers.
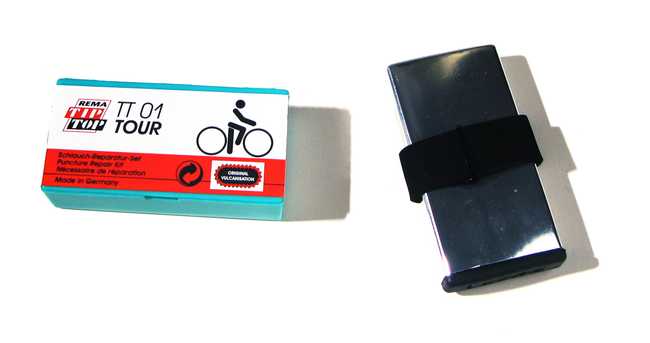
You can also use a patch kit to fix a flat tire. Patch kits, especially the glueless kind, are tiny and lightweight and cheap. You can fit a few hundred patches in the space volume and weight that a single spare tube takes up. You can fix a flat without unmounting the tire. You are stupid to not carry one, and, because you are reading this, if you don’t already have one, I can pretty much guarantee you’ll end up stranded and wish you had one.. because that’s how the universe works.
But patching tubes can be dicey. See, there are two kinds of patch kits:
The first kind are the self-adhesive kits. They are fairly easy to deal with. Rub the “skin” of the tire off with the included scraper, peel the backing off, and apply the patch… and that’s about it. On the other hand, I’ve never found them to be particularly reliable… good in a pinch, but I’ve always found that the patch leaks after a while. Despite this, I keep a kit in my under-saddle bag. It’s a reserve option for long-rides, to protect against too many flats without requiring that I carry a crate of tubes. And the self-adhesive kits are really tiny.
The second kind are wet patch kits, which require a bit more care to do right. You have to rub the “skin” of the tire off with the included scraper, then apply wet glue (hoping that the tube of glue hasn’t dried up), let the wet glue dry, and then apply the patch. I’ve had no problems with the repairs I’ve made with wet patch kits. I keep wet patch kits at home in my bike toolbox. See, there’s no way I’m going to sit around and properly patch the tube while I’m riding with one. But I don’t like to throw away a tube that can be patched easily. Tubes are cheap (especially at Sports Basement) but they aren’t that cheap. And a wet patch kit is a bit bigger than a self-adhesive one.
Given that patch kits are so cheap and can dry out, I think it’s good practice to toss them after a year or three. Better that than to have them fail you when you really need them.
Tire boots and spare tires
If you get a piece of glass in your tire, it’s going to puncture a hole in the tire casing, but that’s OK and you don’t really need to worry about it. But sometimes you have a screwed up tire. Maybe somebody slashes it or maybe you run over a sharp piece of metal. Generally, if the tube can bulge out, the tire’s screwed up.
There are a variety of things you can use to patch things up to make it home. The standard advice is to use a dollar bill (carbon fiber riders use a \$20) as a temporary measure. Candy wrappers can work for broke folks in a pinch. Duct tape or gaffers tape can work quite well. And Park Tool makes specialized adhesive tire boot patches. You can also cut a piece of an existing tire and use that. Regardless of how you “boot” your tire… all it’s intended to do is get you back to a safe place. The tire’s dead.
You can also carry a folding tire. Folding tires use kevlar beads instead of steel beads, which means that you can fold them up fairly compactly.
Tire levers
Road bikes make it easy. With a decently loose tire and a firm grip, you can often change a tire without needing any tools at all. Mountain bikes, on the other hand, often make the whole process quite obnoxious and difficult. There are, of course exceptions. It depends on the tire and rim and how well they match each other and various other things that I’m sure a tire maker will drone on for hours about if you complain that their tires are hard to get on and off the rim.
Tire levers are important. It’s one thing to have to get a ride home because of something tricky or unavoidable. It’s another thing to have to hitch a ride because, even though your tire is fine and you have a spare tube, you broke your tire levers or just can’t get the damn tire off the rim.
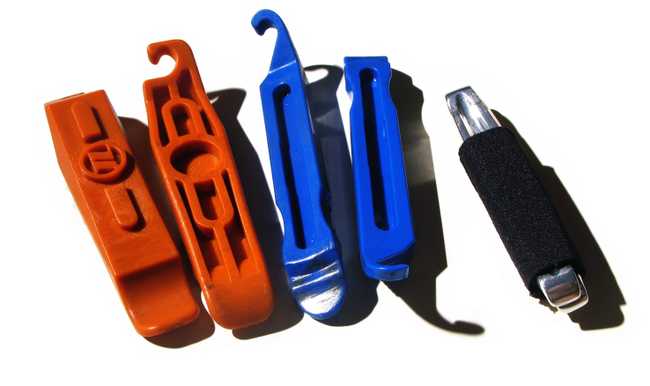
I’ve tried and used a number of different levers so far and realized some palatable differences lately:
In theory, the best material to use is steel or aluminum. I’ve got some Lezyne aluminum levers. It’ll be stronger and the part that fits between the bead and rim is less likely to break from heavy use. On the downside, the rim is also aluminum, which means that if you use the aluminum levers, you risk denting the rim. Thus, I’m not especially fond of aluminum levers, except as a measure to ensure that you don’t find yourself walking home. While a big part of why tire levers are now all plastic is because it’s far cheaper to manufacture, it’s also nice to have the levers a bit softer than the rim…
I’ve seen the Park Tools TL-1 tire lever all over the place. It’s got some plusses, largely that it’s got an especially pointy part that’s got just the right wave shape to really latch on to the rim and bead and lift.
I’ve also seen the Pedros tire lever at a lot of places… unlike the Park Tools version, I’ve seen store-brand clones or near-clones of the design. They don’t quite have the same wavey shape on the pointy part. The big plus is that they are slightly wider so, while you have a harder time jamming them in, they seem to make the rest of the process of getting the bead off the rim much easier.
The part where enlightenment hit was when I realized that it’s much easier to carry two Park Tools TL-1 levers and two Pedros levers. If you are having problem with the TL-1, don’t get frustrated and hurt your hands, just grab the Pedros levers. Conversely, if you are having problems with the Pedros levers, grab the TL-1’s. Except that there’s only so much room in the saddle-bag.
Filling tubes
If you’ve got a spare tube, a tire boot, a patch kit, four tire levers, but your pump doesn’t work right, you won’t be a happy camper. If the guy who stopped to help you doesn’t have the right sort of pump for your tires, it’s even worse. I’ve had problems with pumps failing me at inopportune moments. And I’m not just talking about an isolated incident. I’ve had to throw out several pumps from different brands. Thus, it’s important, at least for those of us who do real riding, to carry two different ways to get air into the tire. So, while I ride with a decently sized hand pump and usually use that to fill up, I’ve also got a CO2 inflator and a schrader-to-presta valve adapter.
The CO2 inflator makes for a nice backup and also is there if you get sick of pumping and just want to get going again.


